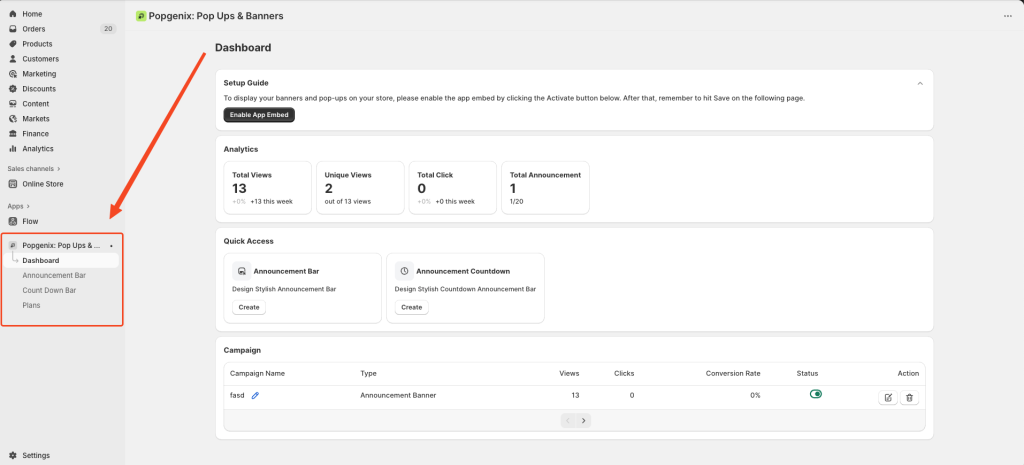
Once you’ve installed and enabled Popgenix from Shopify app store, the Popgenix dashboard becomes your central hub for creating and managing announcement bars and countdown timers. This detailed Popgenix dashboard overview will walk you through each section so you can track performance, manage campaigns, and make quick updates with ease.
Let’s walk through each section of the dashboard in detail:
Dashboard Header: Navigation Context #
At the top of the Popgenix app dashboard, you’ll see:
- App Title:
Popgenix: Pop Ups & Banners– confirms you’re inside the Popgenix interface. - Current Section: The bold Dashboard label shows you’re in the main view.
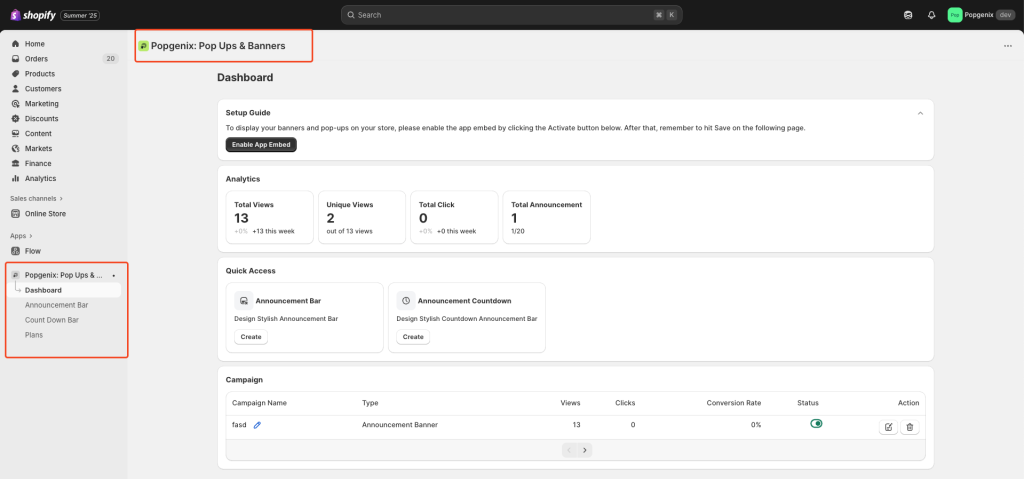
From here, you can navigate to other sections like Announcement Bar, Countdown Bar, Plans, and Settings via the left sidebar.
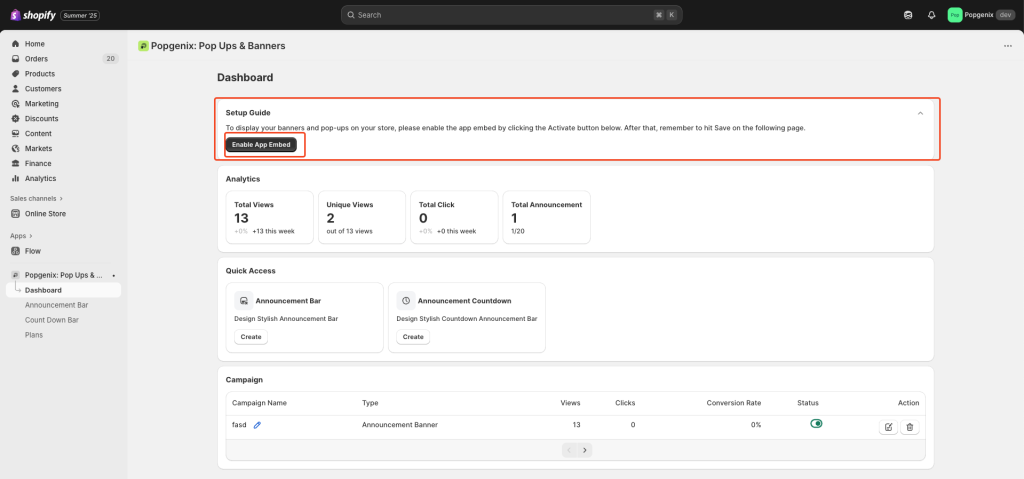
Setup Guide (First-Time Users) #
🔔 Important: If this is your first time using Popgenix, you must enable the App Embed to display bars or timers in your store.
In this section:
Click “Enable App Embed” to open your Shopify Theme Editor.
Under App Embeds, toggle Popgenix ON and click Save.
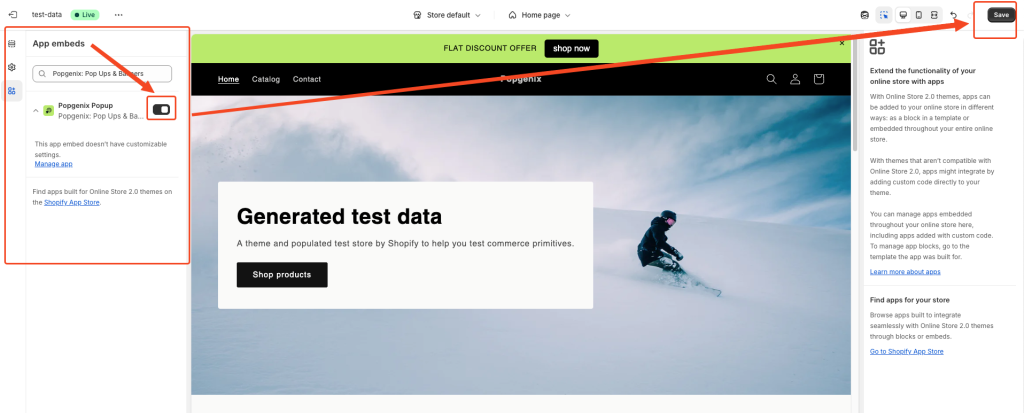
Why this matters: Shopify requires app embeds for storefront visibility. Without enabling it, your campaigns won’t appear, even if active.
✅ Once enabled, you only need to repeat this step if you change themes.
Analytics (Real-Time Campaign Performance) #
The Analytics panel shows how your campaigns are performing:
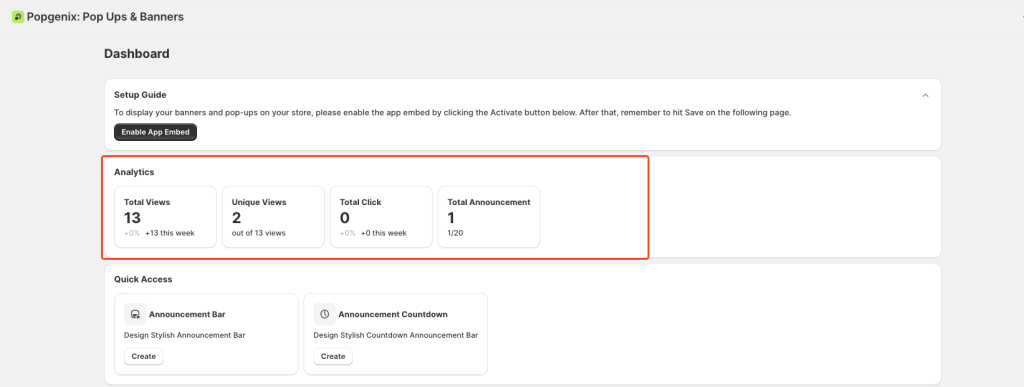
| Metric | Description |
|---|---|
| Total Views | Number of times your announcements were displayed to visitors |
| Unique Views | Individual users who saw the bar (1 per session/device) |
| Total Clicks | Clicks on the bar’s CTA button or links |
| Total Announcements | Created campaigns versus your plan limit (e.g., 1/20 allowed) |
💡 Pro Tip: If a “Flash Sale – Ends Tonight!” bar gets low clicks, test a new CTA or add a countdown timer for urgency.
Quick Access Panel (Create in 1 Click) #
This section gives you shortcuts to instantly create new campaigns without navigating through menus.
Announcement Bar – Perfect for:
- “Free shipping on orders over $50”
- “Sign up for our newsletter and get 10% off.”
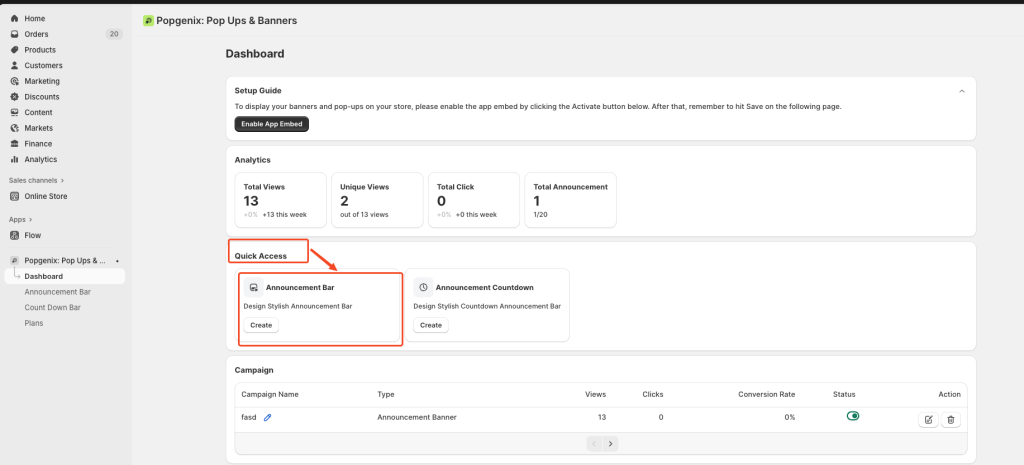
Announcement Countdown – Great for:
- “Deal ends in 2 hours!”
- “Black Friday Starts In…”
- Event countdowns and launches

Clicking Create will take you directly to the campaign editor.
Campaigns Table (Manage All Campaigns) #
The campaigns list in the Popgenix dashboard allows you to manage all campaigns in one place. Each row in the list includes:
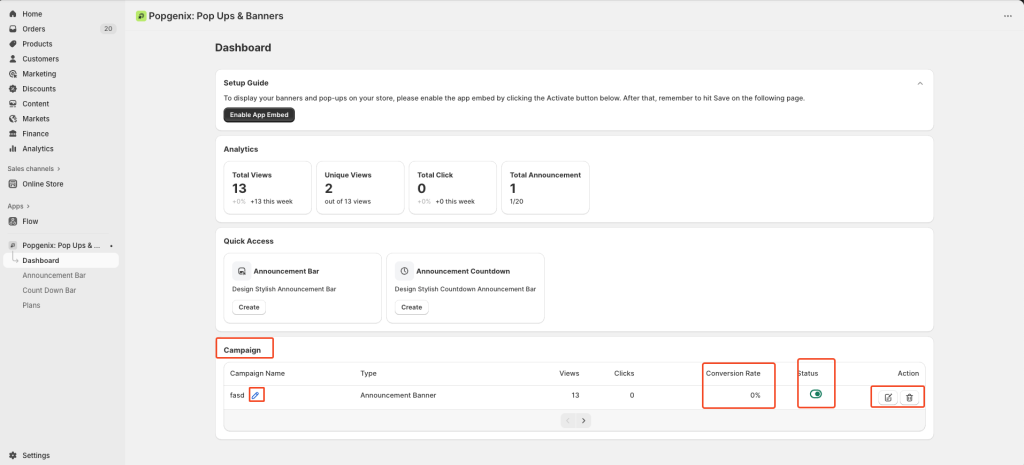
- Campaign Name – Internal name used to identify your campaign.
- Type – Indicates whether it’s an announcement bar or a countdown timer.
- Views – Total number of times the campaign has been displayed on your store.
- Clicks – Total user interactions, such as clicking the CTA button or link.
- Conversion Rate – Percentage calculated by dividing clicks by views.
- Status – Toggle switch to instantly turn the campaign ON or OFF.
- Action – Edit (✏️) or Delete (🗑️) the campaign directly from the table.
💡 Pro Tip: Keep an eye on campaigns with low conversion rates and test different variations, such as new text, button colors, or placement, to improve results.
Sidebar Navigation #
The left-hand navigation gives you quick access to all Popgenix tools:
- Dashboard: Return to the overview
- Announcement Bar: Manage and edit all banner-style campaigns
- Countdown Bar: Create urgency-driven timers
- Plans: Check or upgrade your subscription
- Settings: Configure targeting, display rules, and advanced options