Popgenix announcement bar editor guide — this tutorial walks you through every step of creating, customizing, and scheduling banners in Shopify using Popgenix. Whether you want to announce sales, share updates, or highlight offers, this guide will help you set it up with ease.
TPopgenix announcement bar editor guide helps you design, style, and schedule promotional banners for your Shopify store. These banners are ideal for drawing attention to sales, free shipping offers, event reminders, or special announcements.
Naming Your Banner #
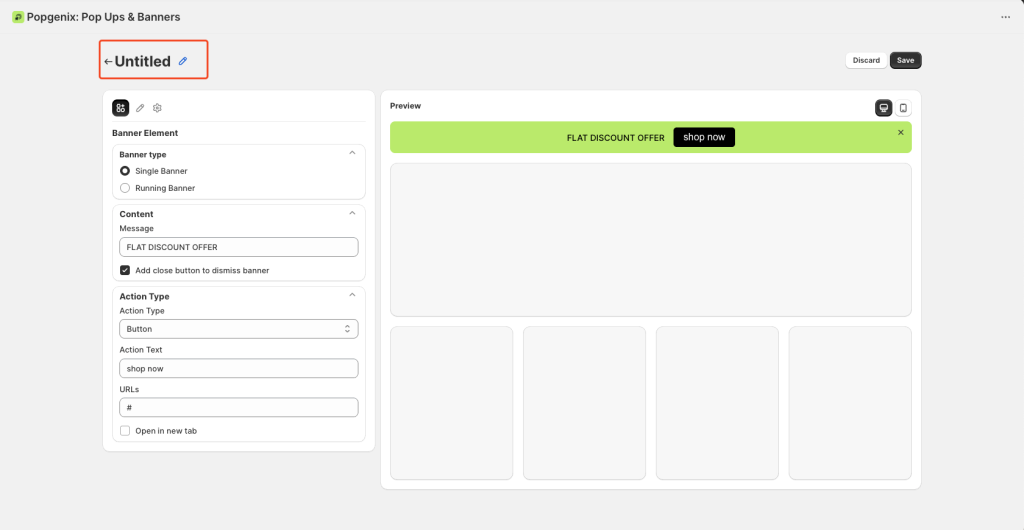
Before you begin Popgenix announcement bar editor guide to customizing your banner, you can give it a name at the top of the editor.
Default State: If you haven’t named the banner yet, it will appear as Untitled.
- How to Rename:
- Click the small pencil icon ✏️ next to “Untitled.”
- Type your new banner name.
- Press Enter or click outside the field to save the name.
💡 Why Naming is Important:
- Helps you quickly identify banners in your campaign list.
- Useful when you have multiple banners for different events, sales, or audiences.
The editor has three main tabs:
- Banner Element – Controls the content and action of your banner.
- Design Settings – Controls how your banner looks (colors, fonts, images, etc.).
- Banner Settings – Controls when and where your banner is shown.
1️⃣ Banner Element – Adding Your Banner Content #
This is where you set the main message and interactive features of your announcement bar. Think of it as writing the text and deciding what happens when a customer clicks.
A. Banner Type #
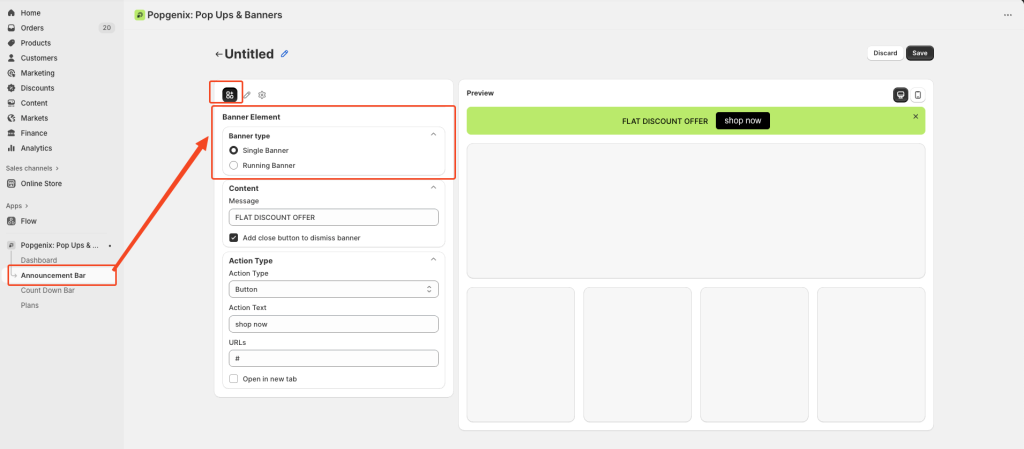
i. Single Banner
- A fixed, static message that stays in place.
- Best for short, important messages like:
- “Free Shipping Today Only”
- “New Collection Now Available”
- Easy to read at a glance without movement.
ii. Running Banner
- A moving/scroller (marquee-style) message.
- Great for longer announcements or listing multiple offers in a single line, for example:
- “Flash Sale – 50% OFF All Items | Free Shipping Over $50 | New Arrivals Just In”
- More dynamic and attention-grabbing.
💡 Tip: If your text is long or you want multiple messages, use Running Banner. For urgent, short offers, use Single Banner.
B. Content #
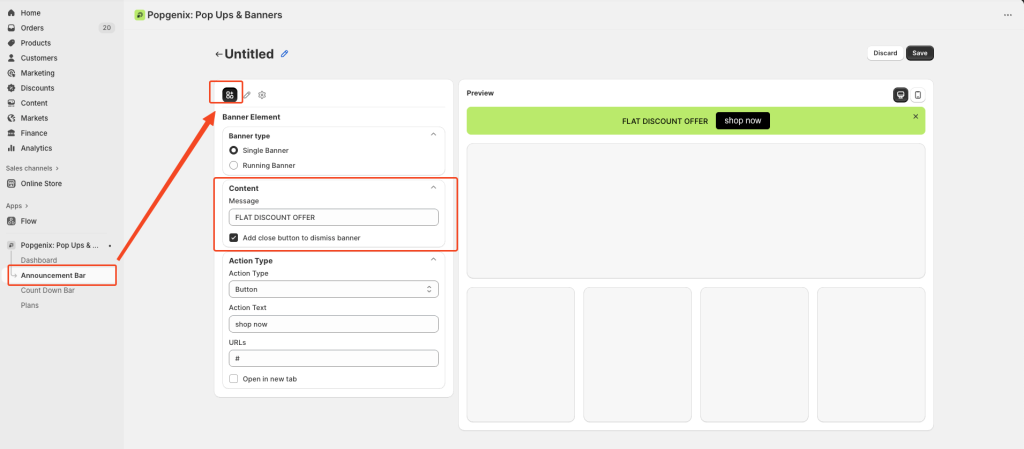
i. Message – The main text of your banner.
- Be clear, short, and benefit-focused.
- Example: Instead of “We are having a sale”, write “Get 30% OFF – Today Only!”
ii. Add Close Button – Let visitors dismiss the banner.
- Good for announcements that aren’t critical (like “Follow us on Instagram”).
- For urgent sales, you may leave it unchecked so it stays visible.
C. Action Type #

This determines what happens when someone clicks your banner.
- Button – Adds a clickable button alongside your message.
- Example: “Shop Now” → Links directly to your sale collection.
- Link – Makes the entire banner clickable.
- Useful for large banners where you don’t want a separate button.
- None – No clickable action (purely informational).
Additional Fields:
- Action Text – The button label (e.g., “Grab Offer”, “Shop Now”, “Learn More”).
- URL – The link the button or banner should go to.
- Can be a product page, collection, or external link.
- Open in New Tab – Enable this if linking to an external site so customers don’t lose your store tab.
💡 Tip: Always use action words like Shop, Grab, Get, or Claim instead of vague “Click Here”.
2️⃣ Design Settings – Customizing the Look #
This is where you make your banner look professional and match your brand style.
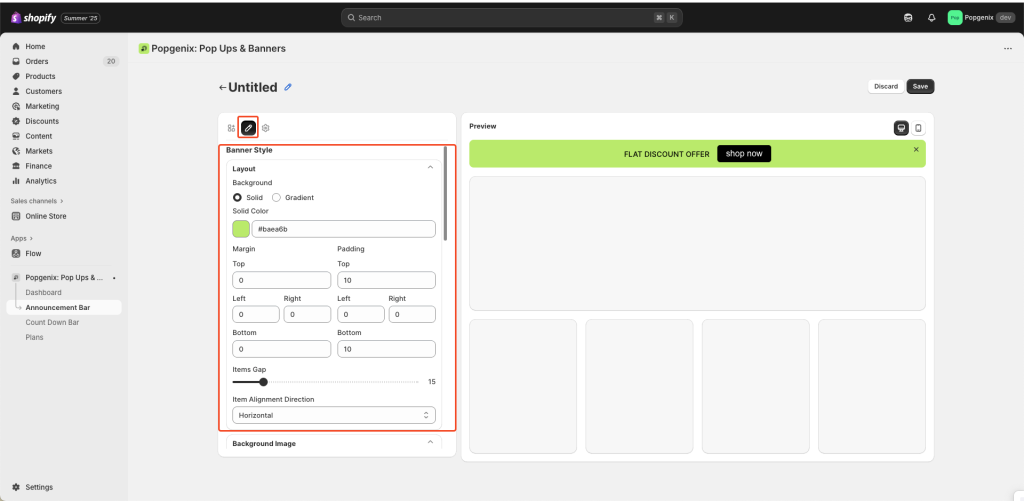
A. Banner Style #
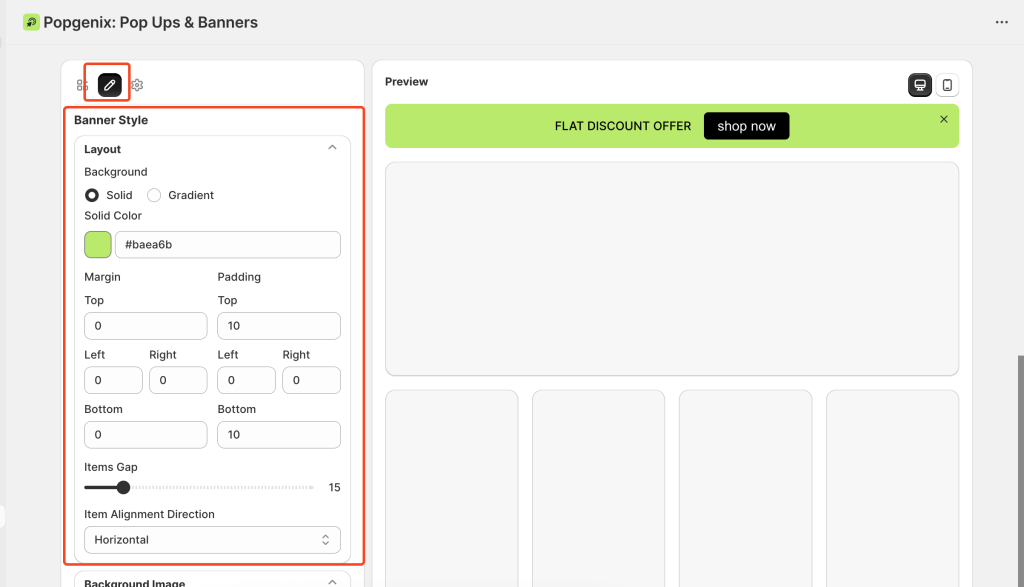
Background
- Solid – One flat color (set with color picker or hex code).
- Gradient – Smooth transition between two colors for extra visual impact.
Margin – Space outside the banner (distance from page edges or other elements).
Padding – Space inside the banner (distance between text/button and banner edge).
Items Gap – Space between your text and button.
Item Alignment Direction – Horizontal (side-by-side) or Vertical (stacked).
💡 Tip: Use high contrast between background color and text color for maximum readability.
B. Background Image #
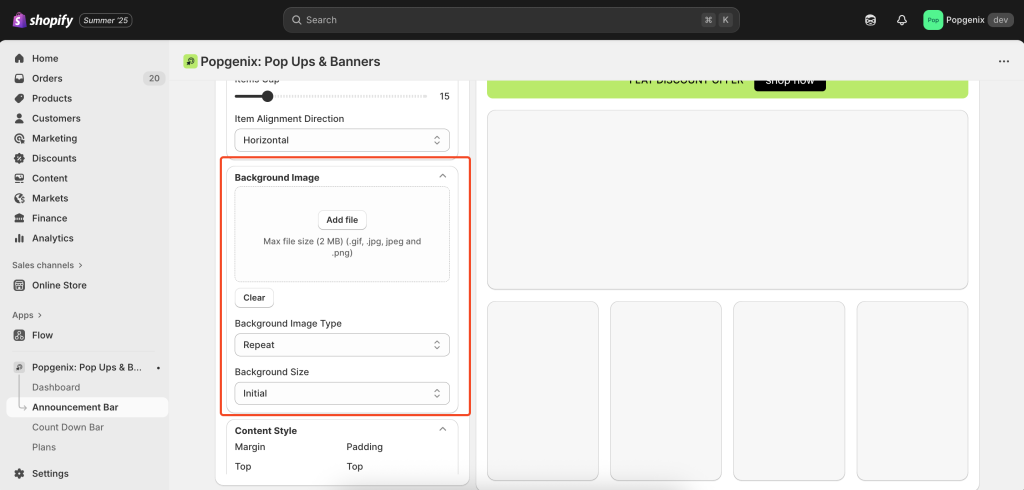
- Add File – Upload an image to appear behind your text and button.
- Background Image Type – Choose repeat pattern or single image.
- Background Size – Initial (original size), Cover (fills banner), or Contain (fits without cropping).
C. Content Style #
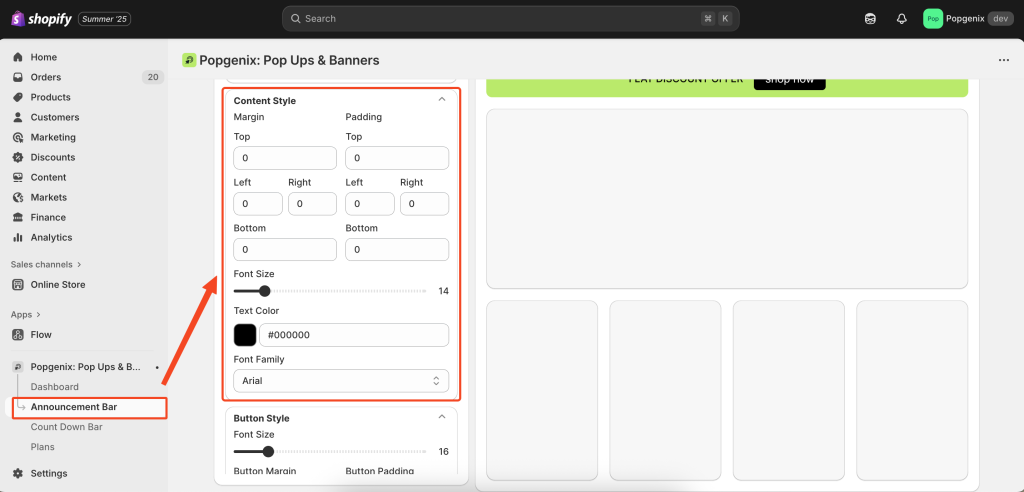
- Adjust margins and padding for text and button area to control spacing and alignment.
- Set Font Size, Text Color, and Font Family.
- Match your store’s typography for a consistent look.
D. Button Style #
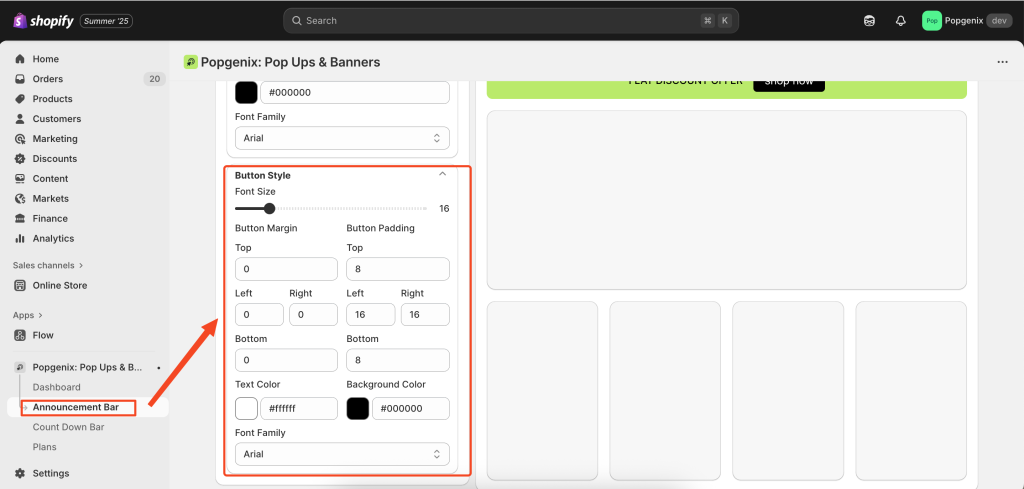
- Font Size – Size of button text.
- Button Margin/Padding – Controls button shape and spacing.
- Text Color & Background Color – Adjust for visibility and brand style.
💡 Tip: Make your button stand out by using a contrasting color.
3️⃣ Banner Settings – Controlling When & Where #
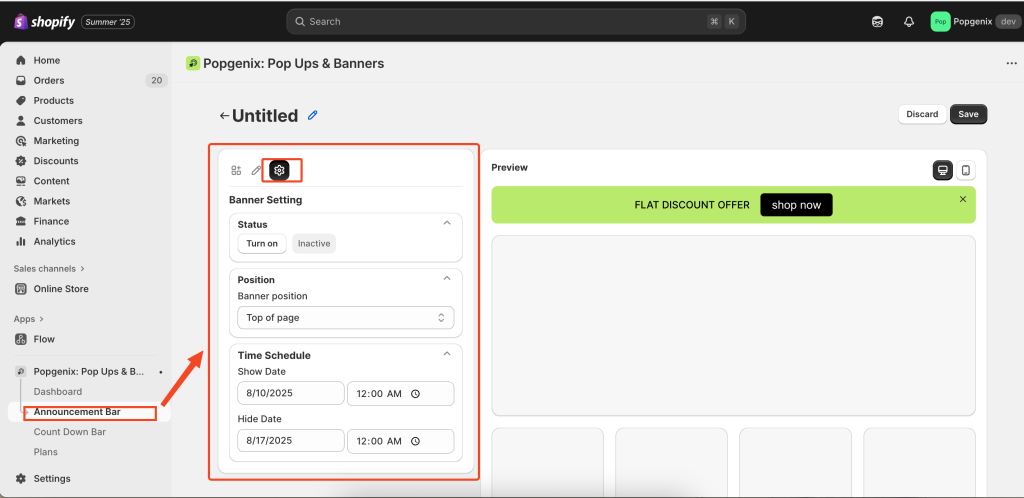
This tab controls the status, position, and schedule of your banner.
A. Status #
- Turn On – Makes banner visible.
- Inactive – Keeps banner hidden but saved for later use.
B. Position #
- Top of Page – Places banner above all content (most visible).
- Some themes may allow bottom placement.
💡 Tip: Place critical promotions at the top for higher visibility.
C. Time Schedule #
- Show Date – When the banner starts showing.
- Hide Date – When the banner stops showing automatically.
💡 Tip: Always check your store’s time zone settings to ensure accurate scheduling.
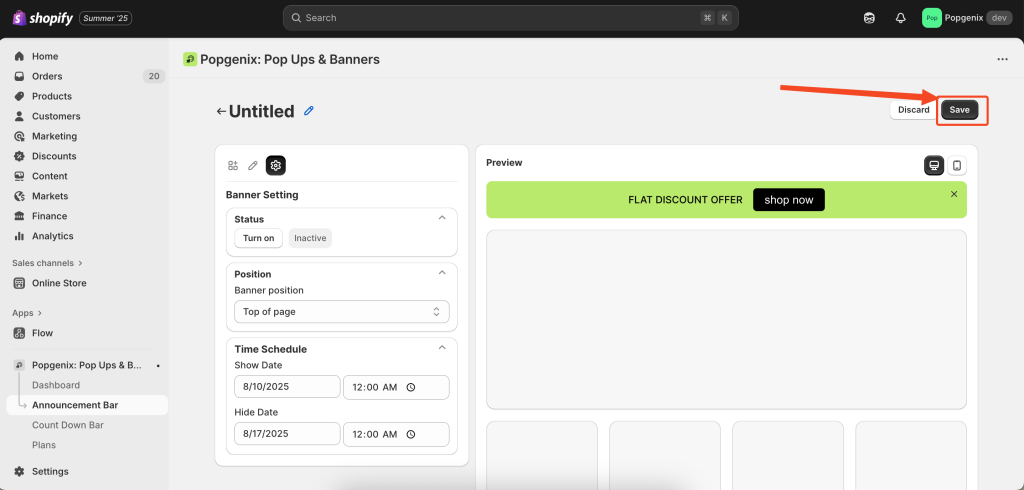
Saving Your Banner #
Once all settings are configured:
- Click Save (top right) to apply changes.
- Click Discard to cancel changes and revert to the last saved version.